Cloud nesting: from model to NC programs
When the design is done, BlendCab sends every board to the nesting page in your browser. There you check the cut list, nest it onto sheets, print labels and download the NC programs for your CNC router.
Cloud nesting needs a plan that includes Nesting (Standard or higher). If you skipped the quick start, any BlendCab cabinet will do.
1. Send the design from Blender
Add cam connectors
Press A to select everything. In the BlendCab menu, open Cam Connectors and choose Create/Refresh Connectors. BlendCab places the cam locks and dowels where the panels meet, and the holes go into the NC programs.
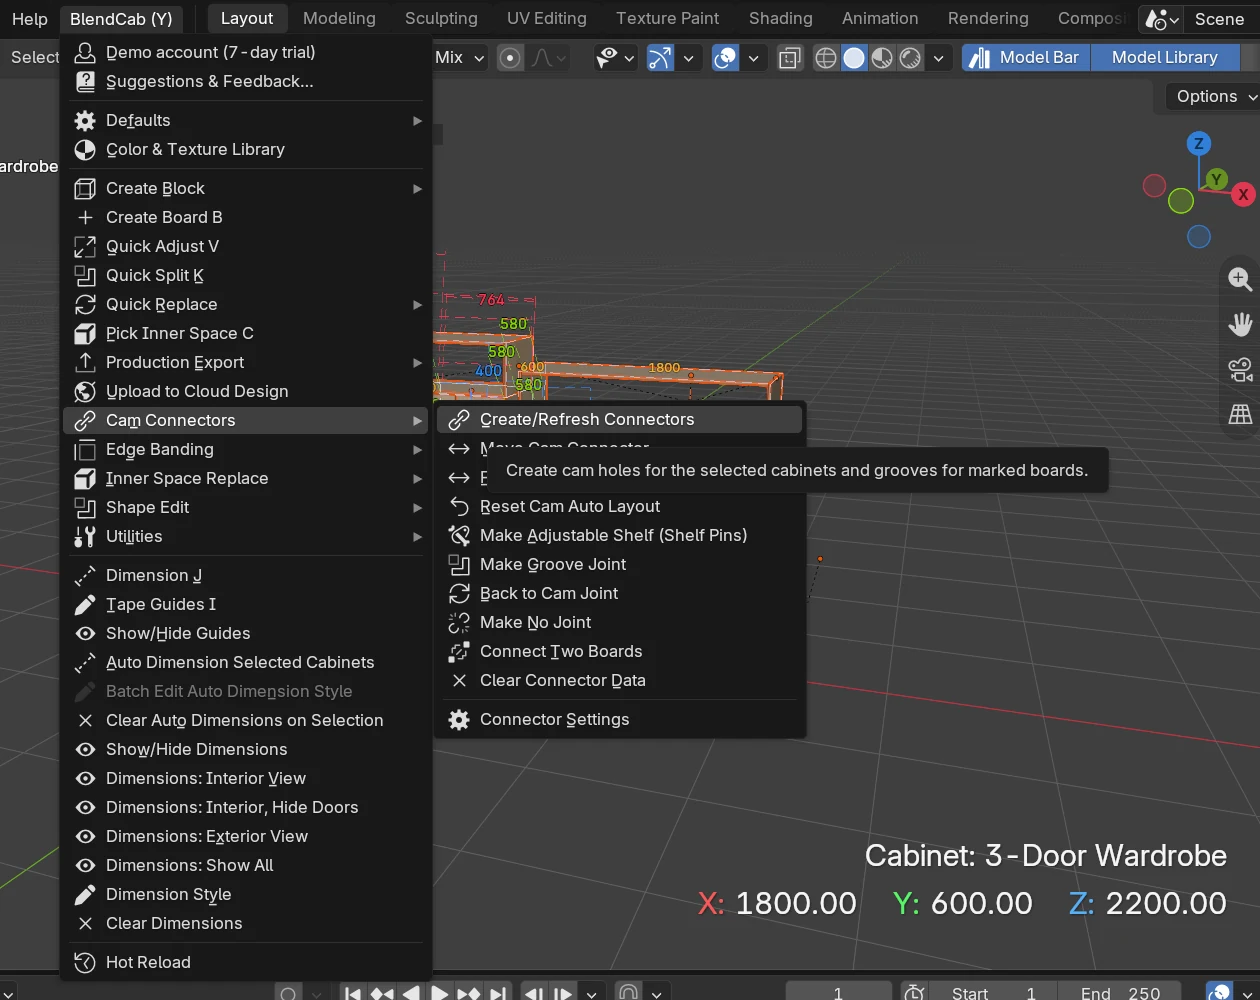
Changed the design afterwards? Run Create/Refresh Connectors again before you send it.
Open Production Nesting
In the BlendCab menu, choose Production Export › Production Nesting (Cloud). Pick the scope (all boards, or Selected Boards Only) and leave the connector and hole checks on: they warn you about missing connectors before anything is cut. Click Confirm and Continue.
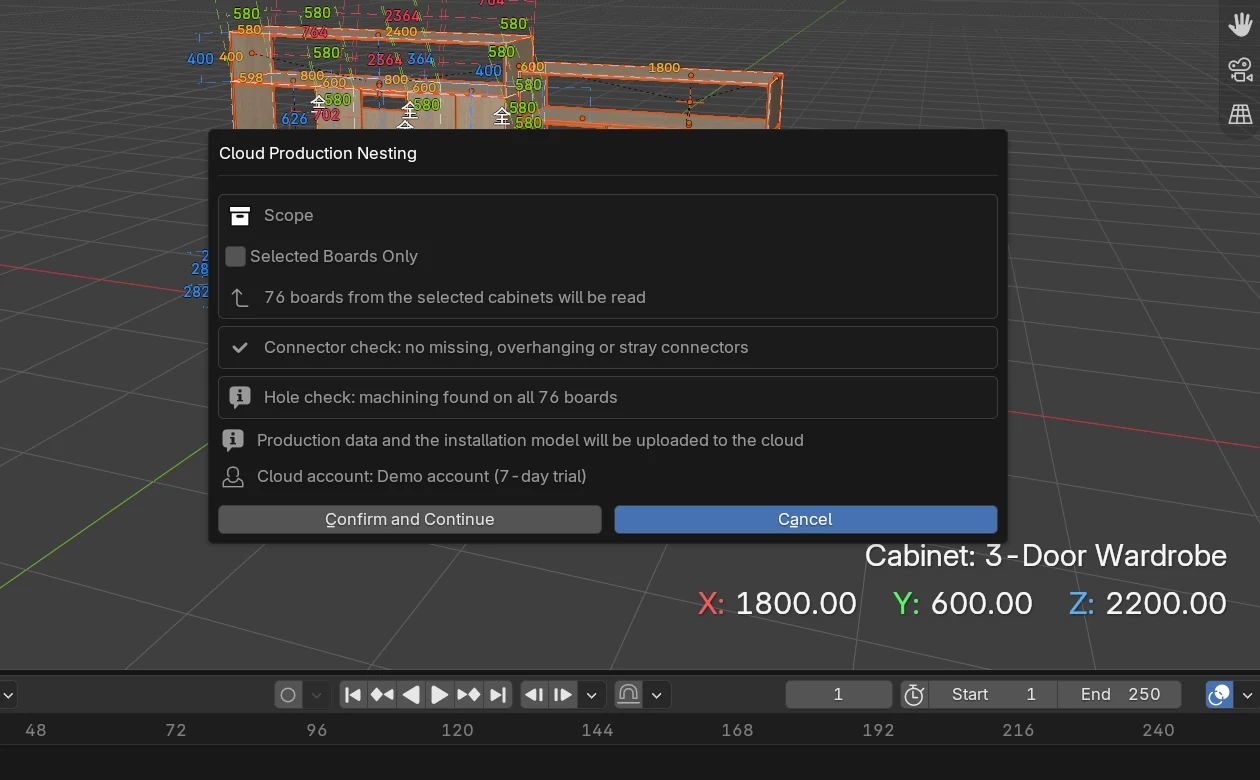
The nesting page opens in your browser, already signed in, with your boards loaded.
2. Check the cut list and nest
Check the cut list
Every board is one row: name, size, material, edge banding and holes. Check the sizes and materials. You can edit a row or delete boards you don’t want to cut.
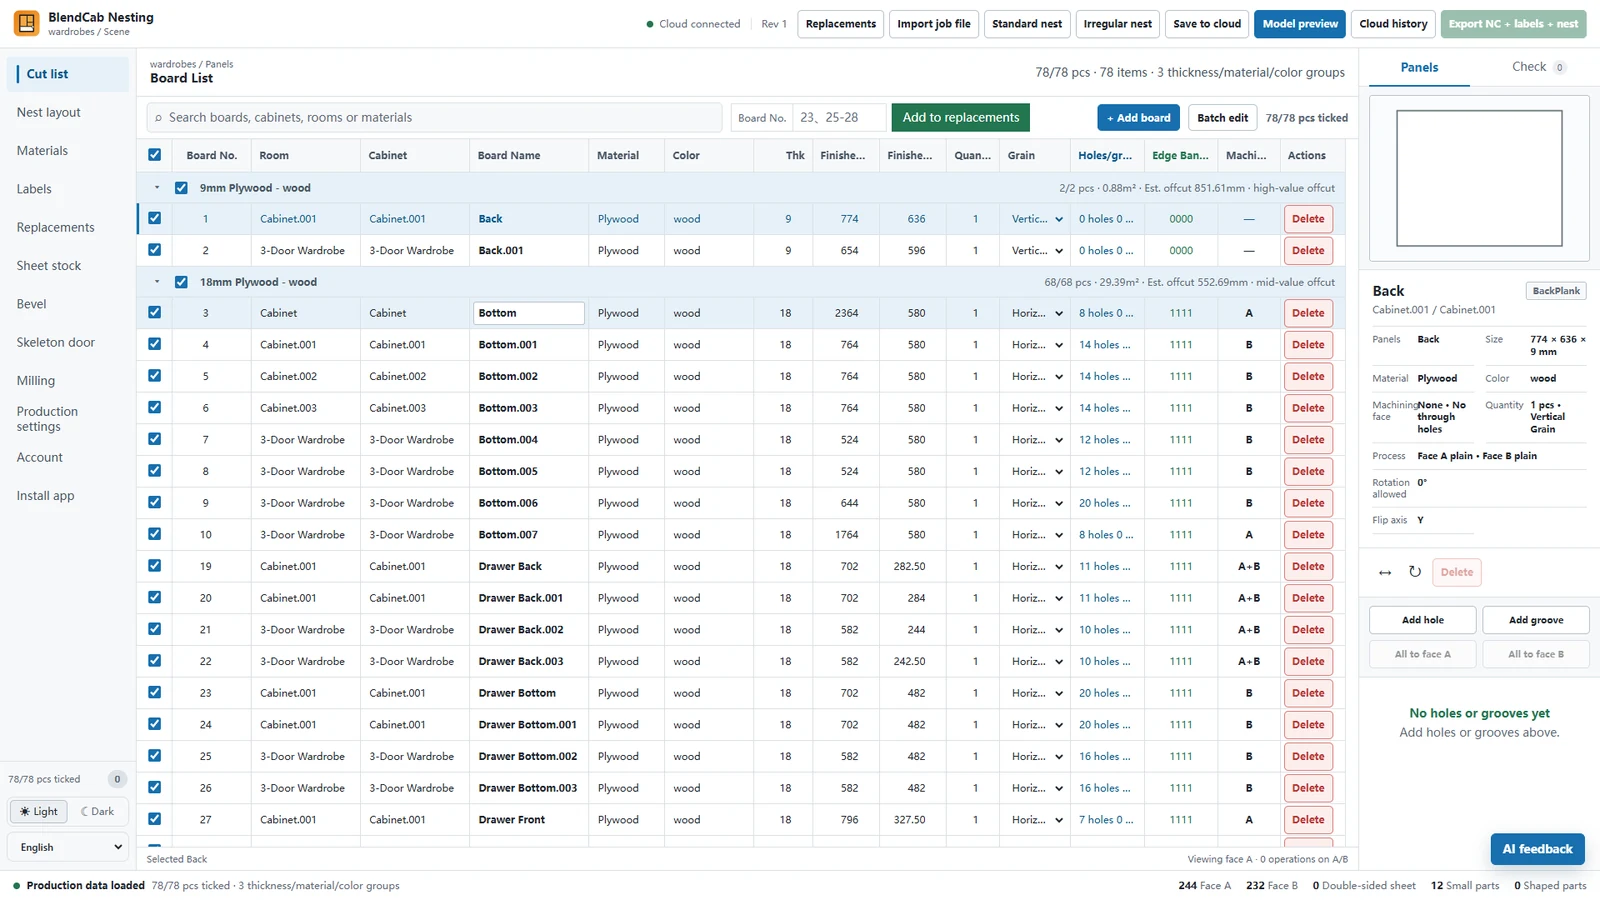
Set your sheets and machine
Under Sheet stock and Production settings, enter your sheet sizes, trim, the gap between parts and the cutting tool. These are saved, so you only set them once.
Nest
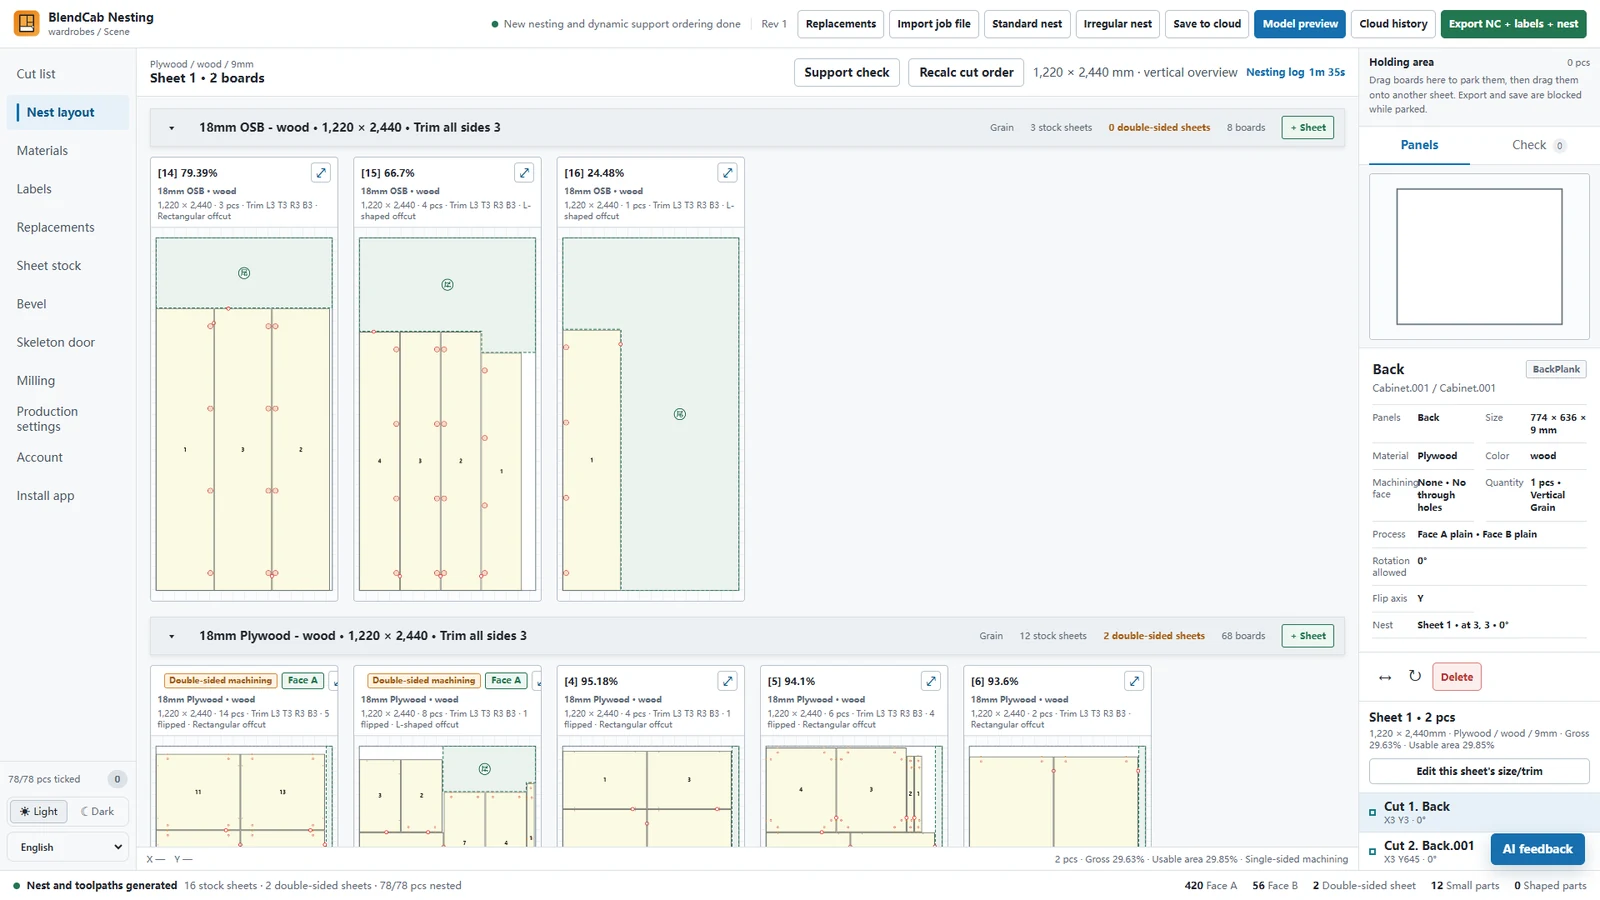
Click Standard nest. Each sheet shows its parts, the cut order and the yield. Step through the sheets, flip between the A and B faces, and use Recalc cut order after moving parts. Support check flags small parts that could shift once they are cut free.
3. Labels, materials and export
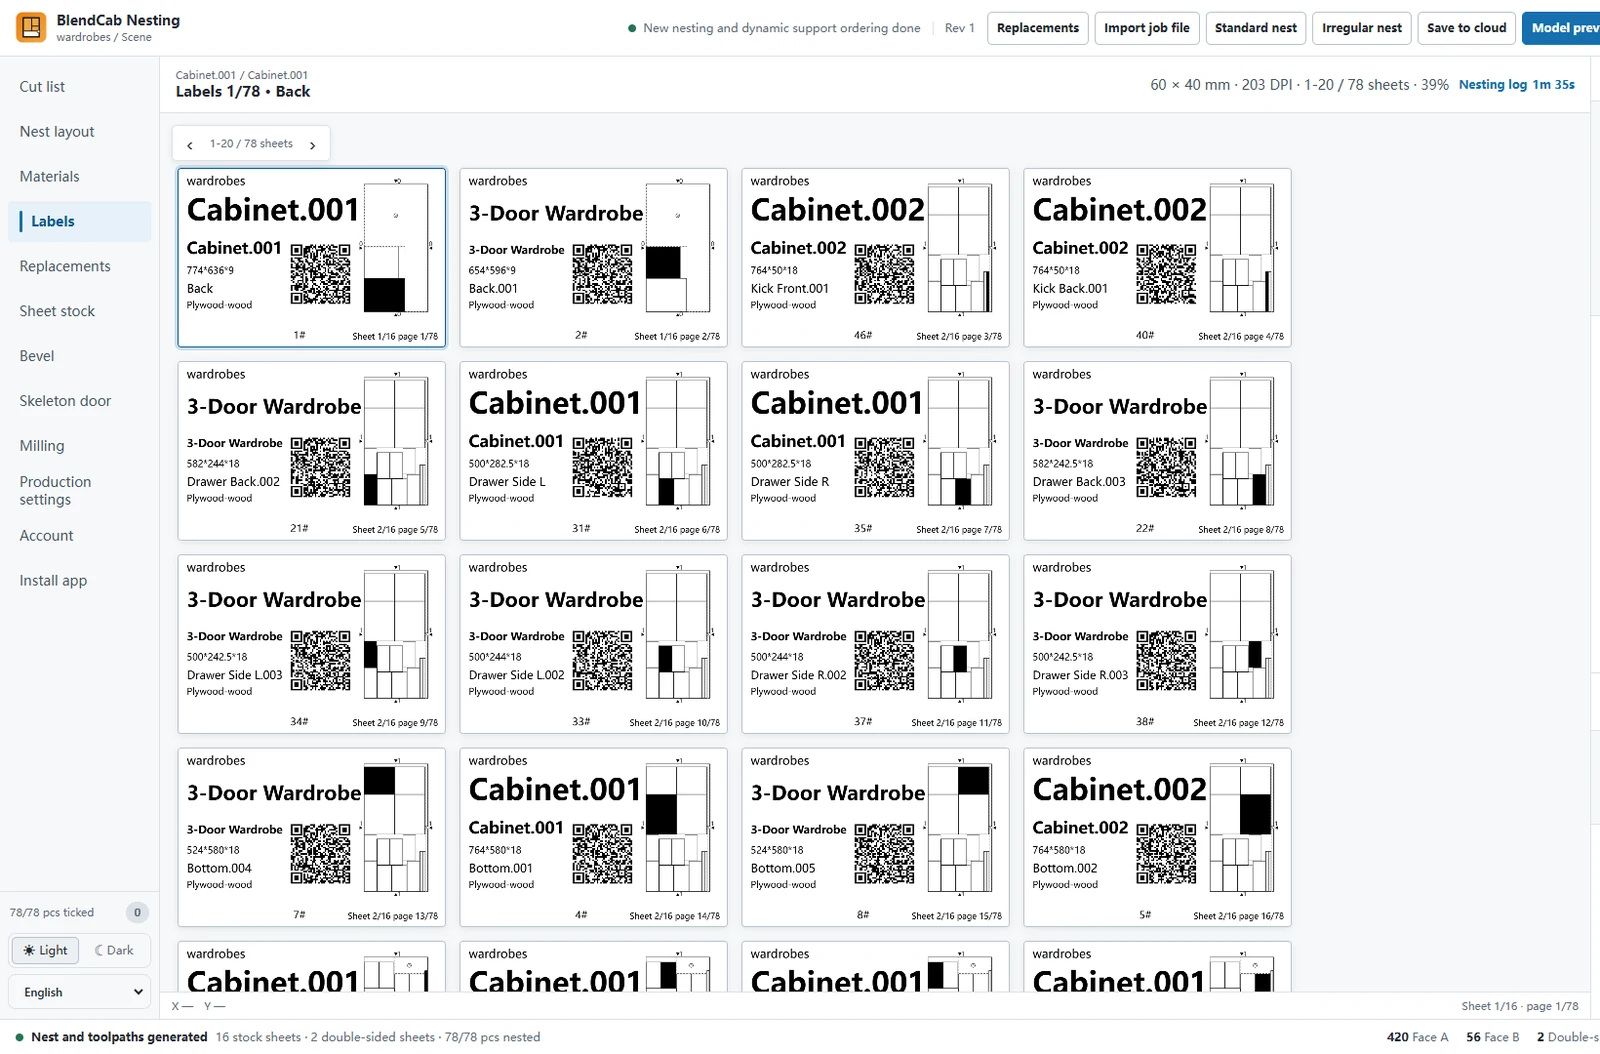
Print labels
Each part gets a 60 × 40 mm label with its name, size, cabinet, banding and a QR code. Stick them on as the parts come off the machine, so nothing gets mixed up at assembly.
Check materials and hardware
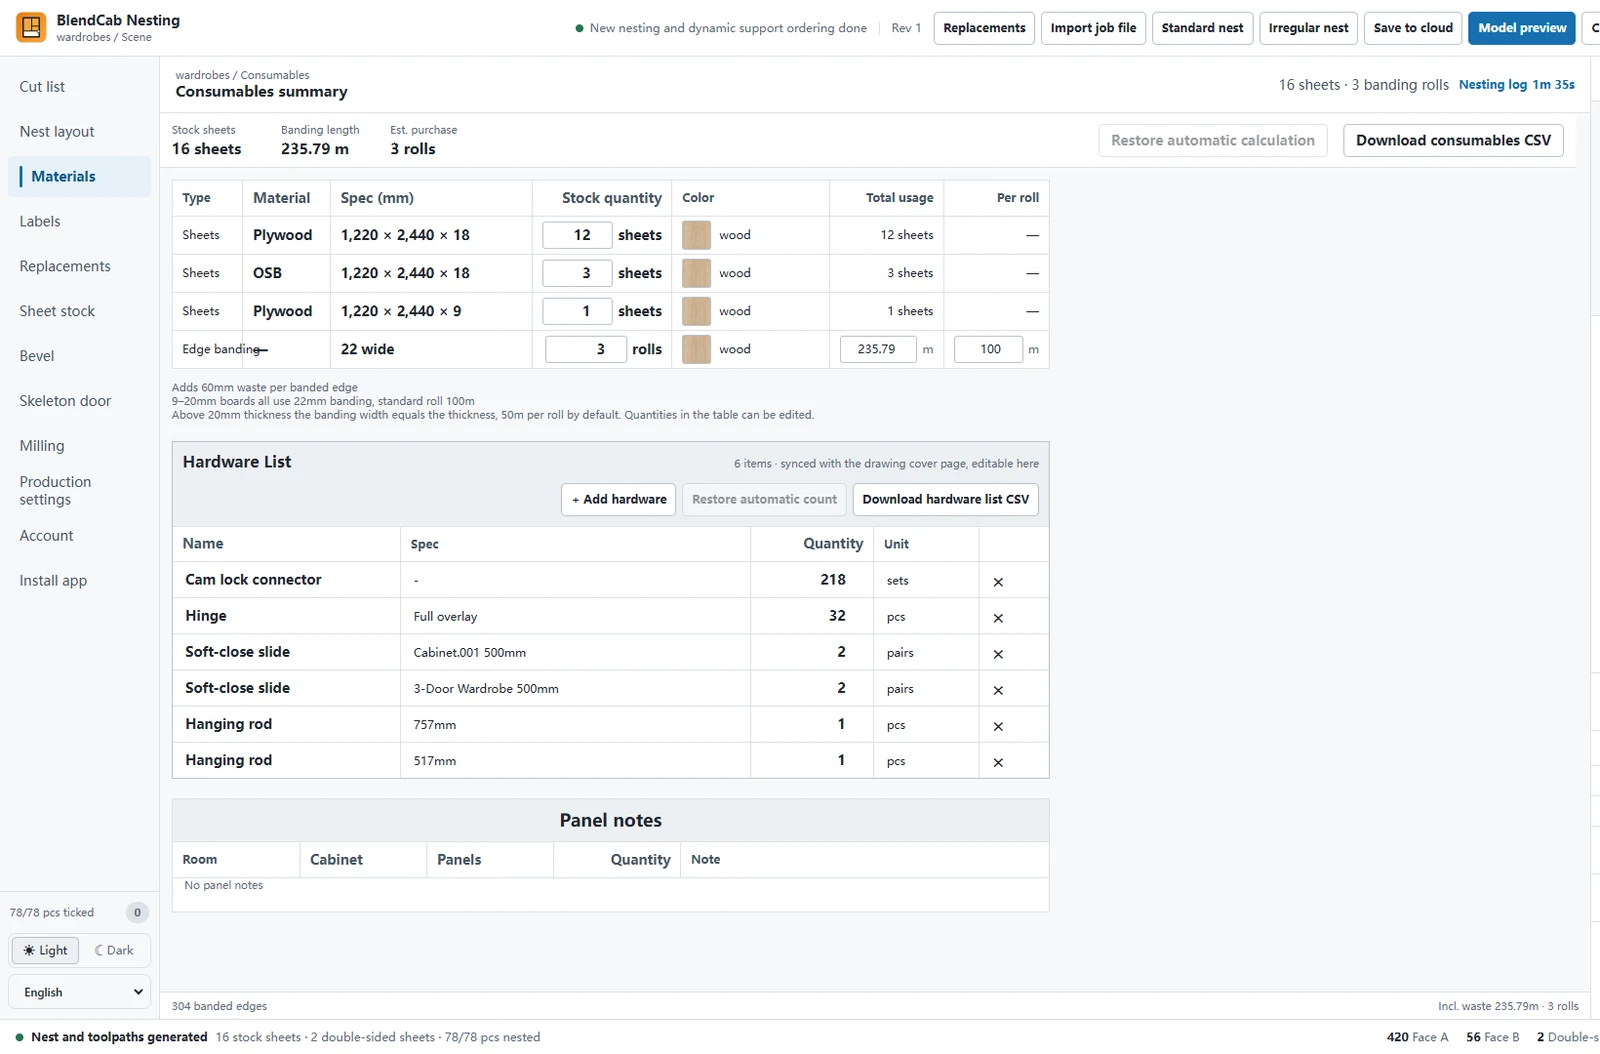
Materials adds up the sheets, edge banding and hardware: hinges, slides, cam locks and more. The hardware list is editable and downloads as CSV for ordering.
Export
Click Export NC + labels + nest. You get one zip with an
.ncprogram per sheet, the label PDF, the hardware CSV and the nest data.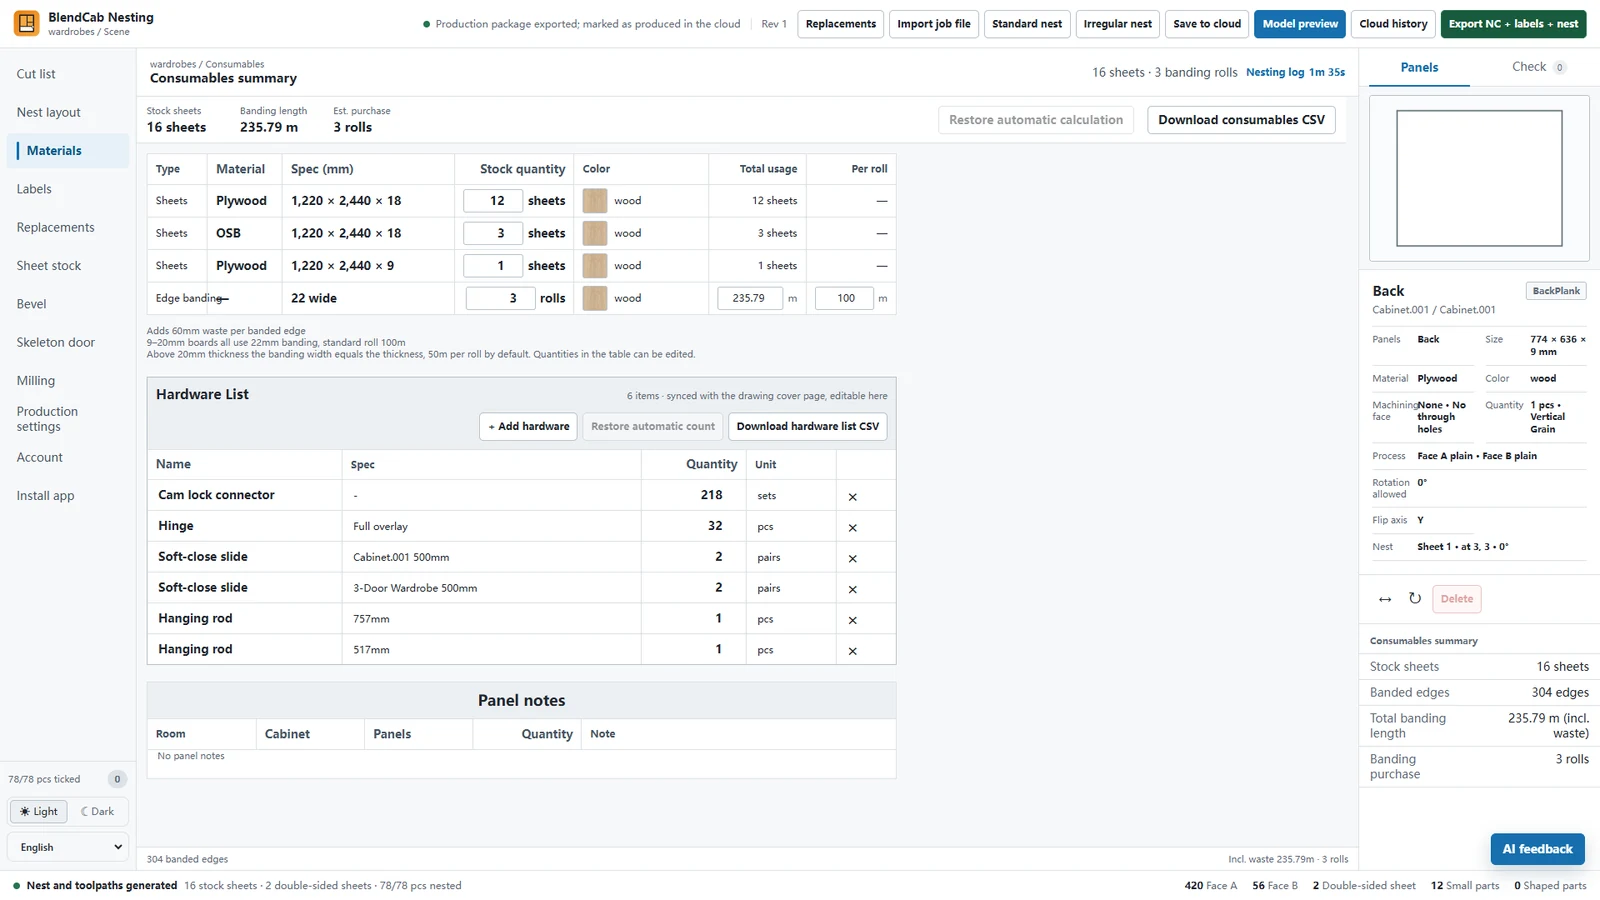
Tips
- Test-cut the first sheet on a new machine or tool before cutting a whole job.
- With the Cloud plan, every nest is saved to your cloud history, so you can reopen and re-export it later.
- In Chrome or Edge you can install the nesting page as a desktop app from the address bar.
That’s the full workflow, from an empty Blender scene to NC programs. More tutorials are on the way: see all tutorials.