Quick start: a wardrobe in five minutes
We’ll build a 2400 × 600 × 2400 mm wardrobe: three columns with a top cabinet, shelves on the left, drawers and a hanging rod, and hinged doors. You’ll use the five keys that do most of the work in BlendCab.
Keep the mouse over the 3D view while you work: BlendCab’s keys act on whatever is under the pointer. Sizes are typed in millimetres. Esc or a right-click leaves any tool.
1. Block out the wardrobe
Start with one plain block the size of the whole wardrobe, then cut it into the cabinets you want.
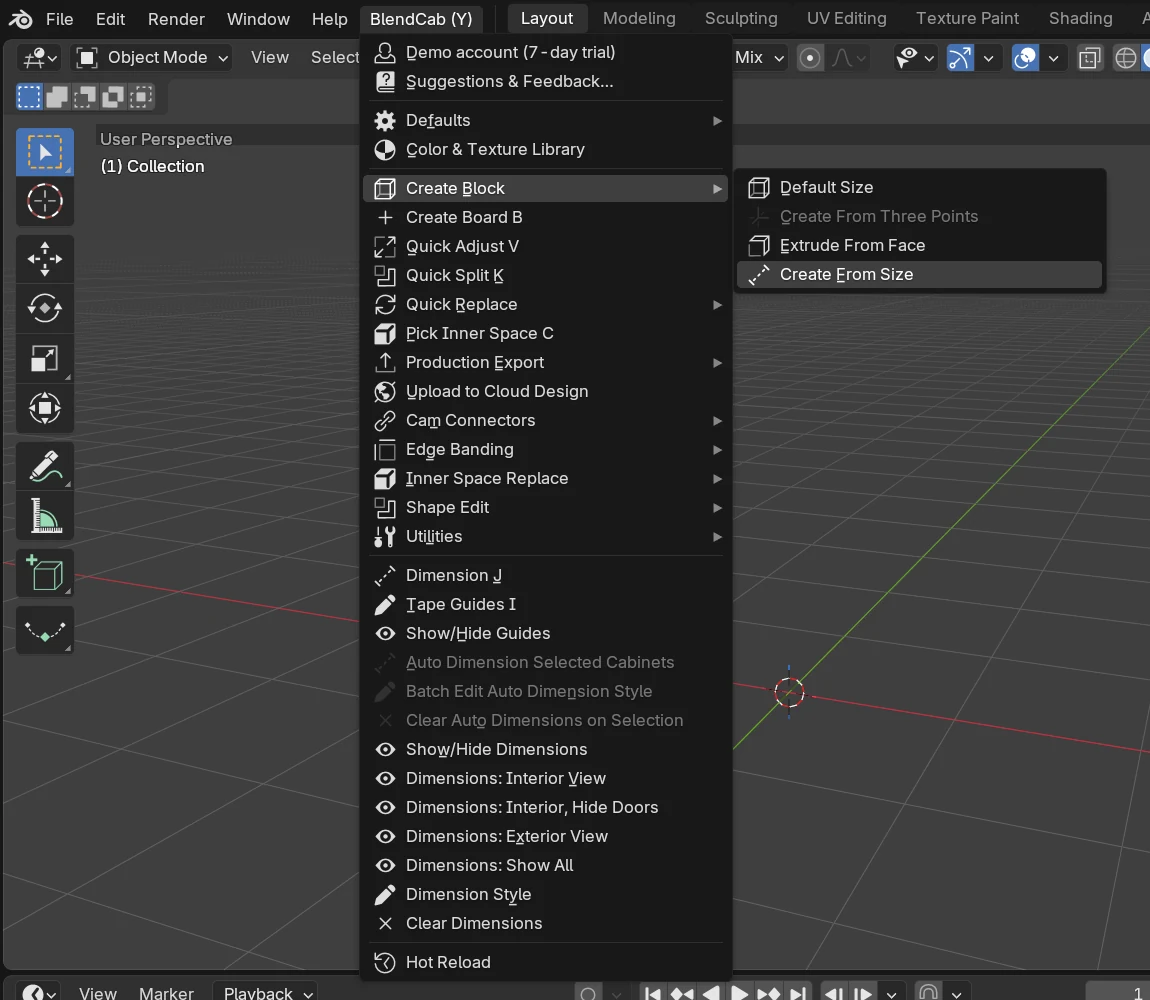
Create a block from its size
Open the BlendCab menu, then Create Block › Create From Size.
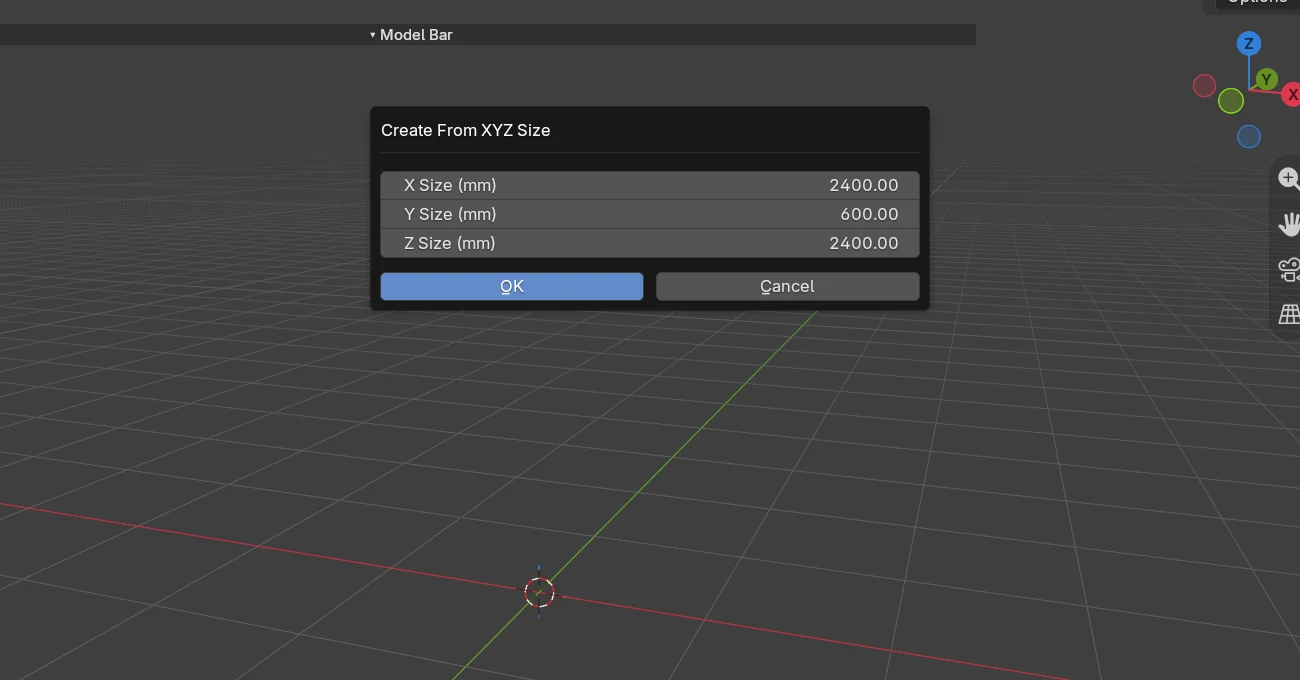
Type the size
Enter 2400 wide (X), 600 deep (Y) and 2400 high (Z), and click OK.
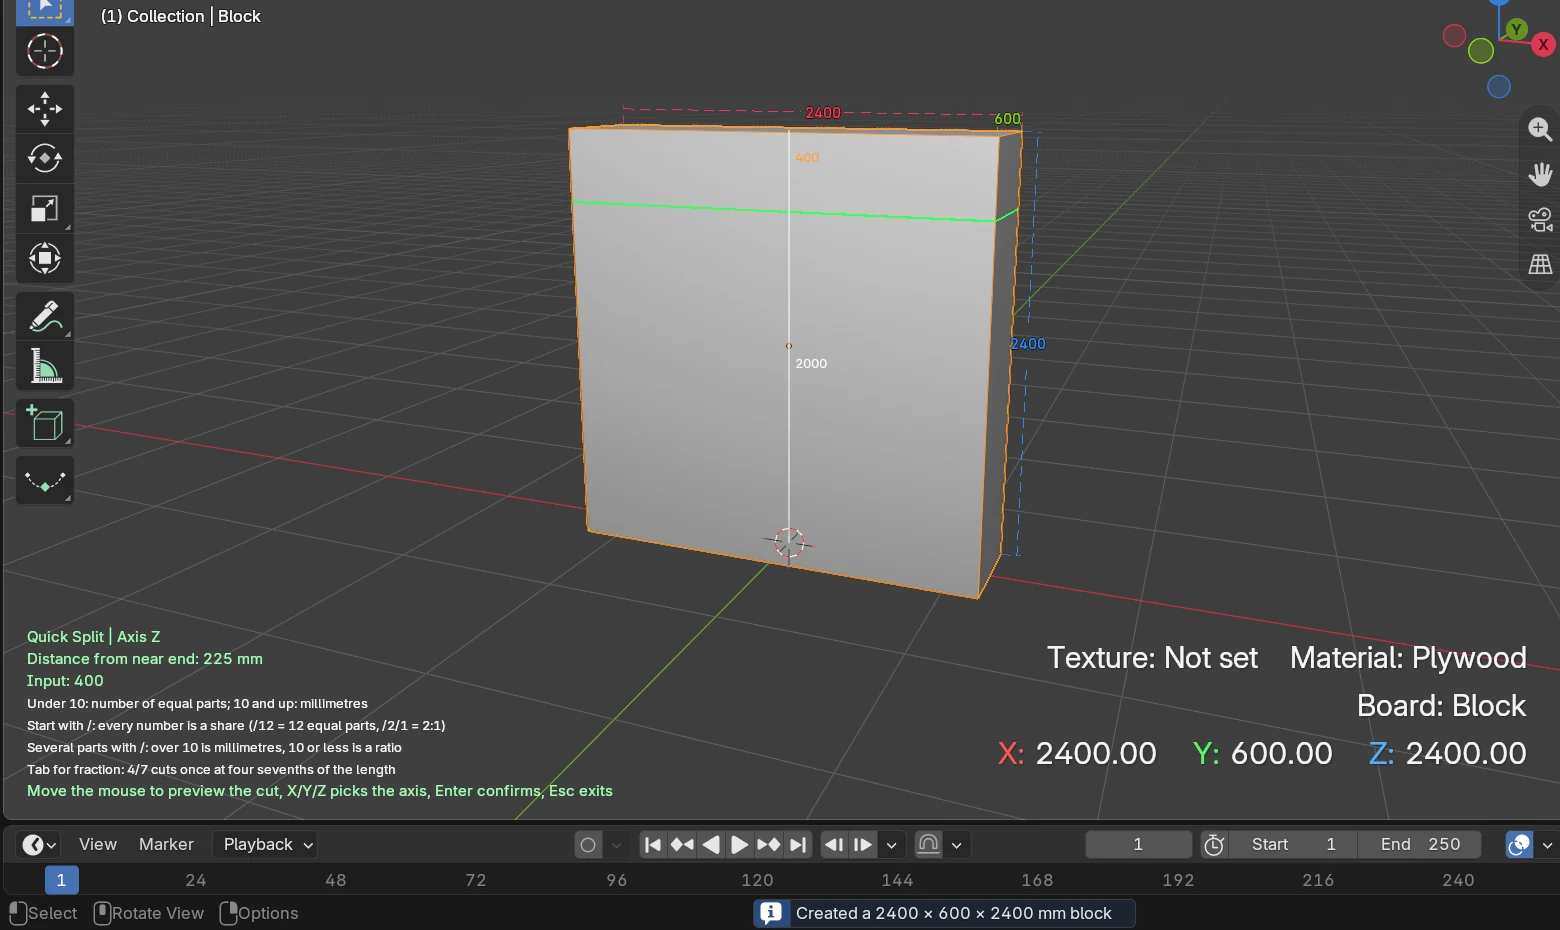
Split off a top cabinet with K
Point near the top of the block and press K (Quick Split). Press Z to cut across the height, type 400 and press Enter: a 400 mm top cabinet is split off. The hints in the bottom-left corner list every option.
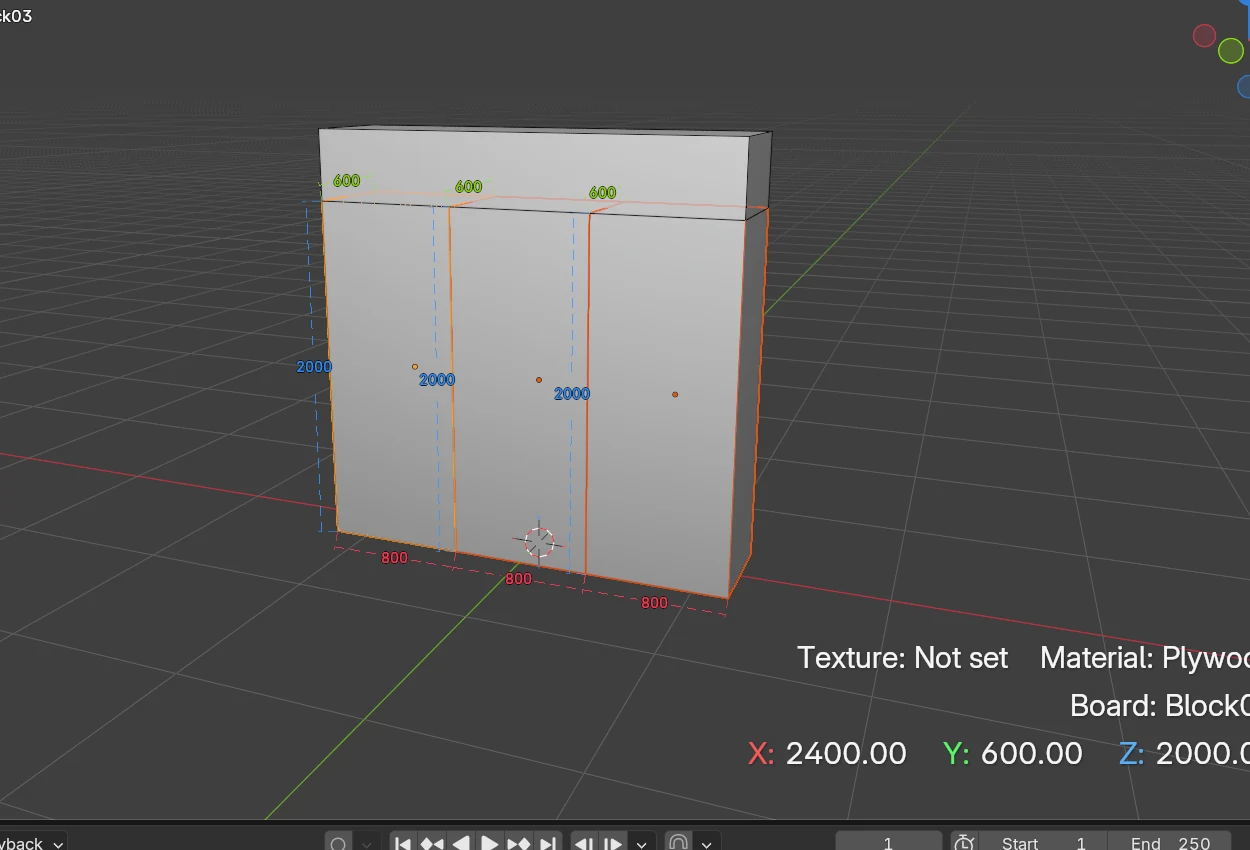
Split the rest into three columns
Click the lower part and press K again. Press X, type 3 and press Enter. A number under 10 means “split into equal parts”, so you get three equal columns.
2. Turn the blocks into cabinets
Create Cabinet Frame
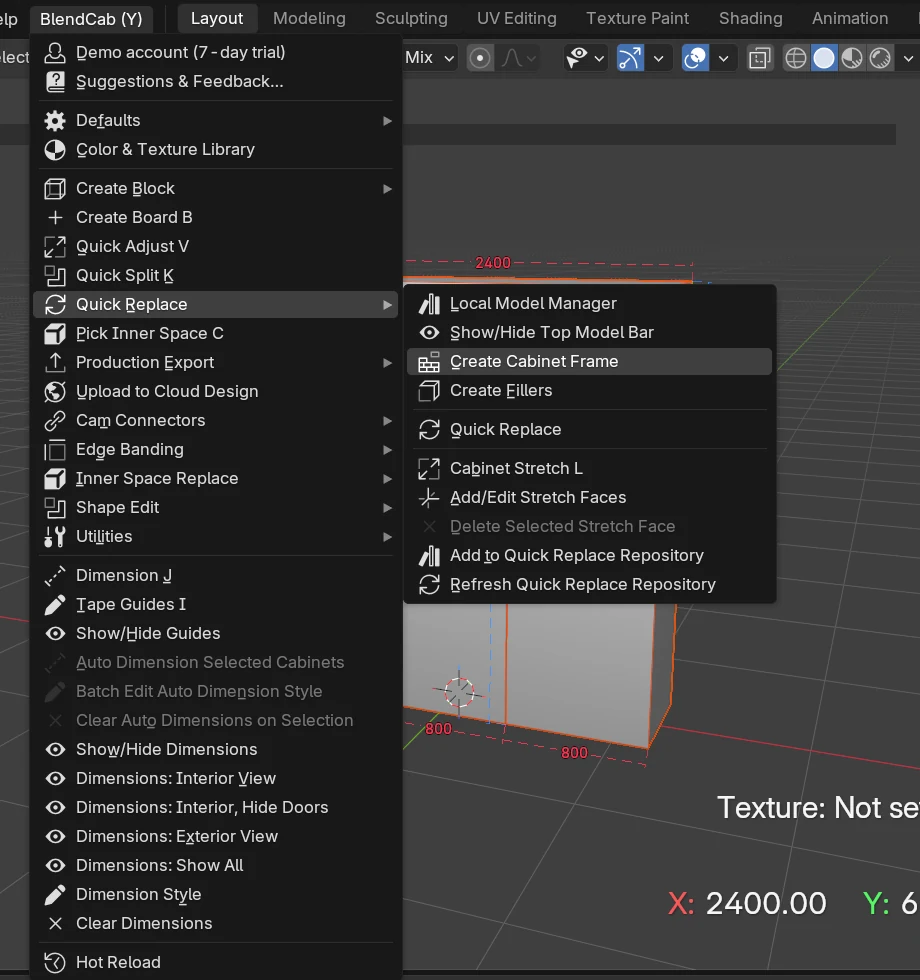
Press A to select everything. In the BlendCab menu, open Quick Replace and choose Create Cabinet Frame.
Confirm the frame settings
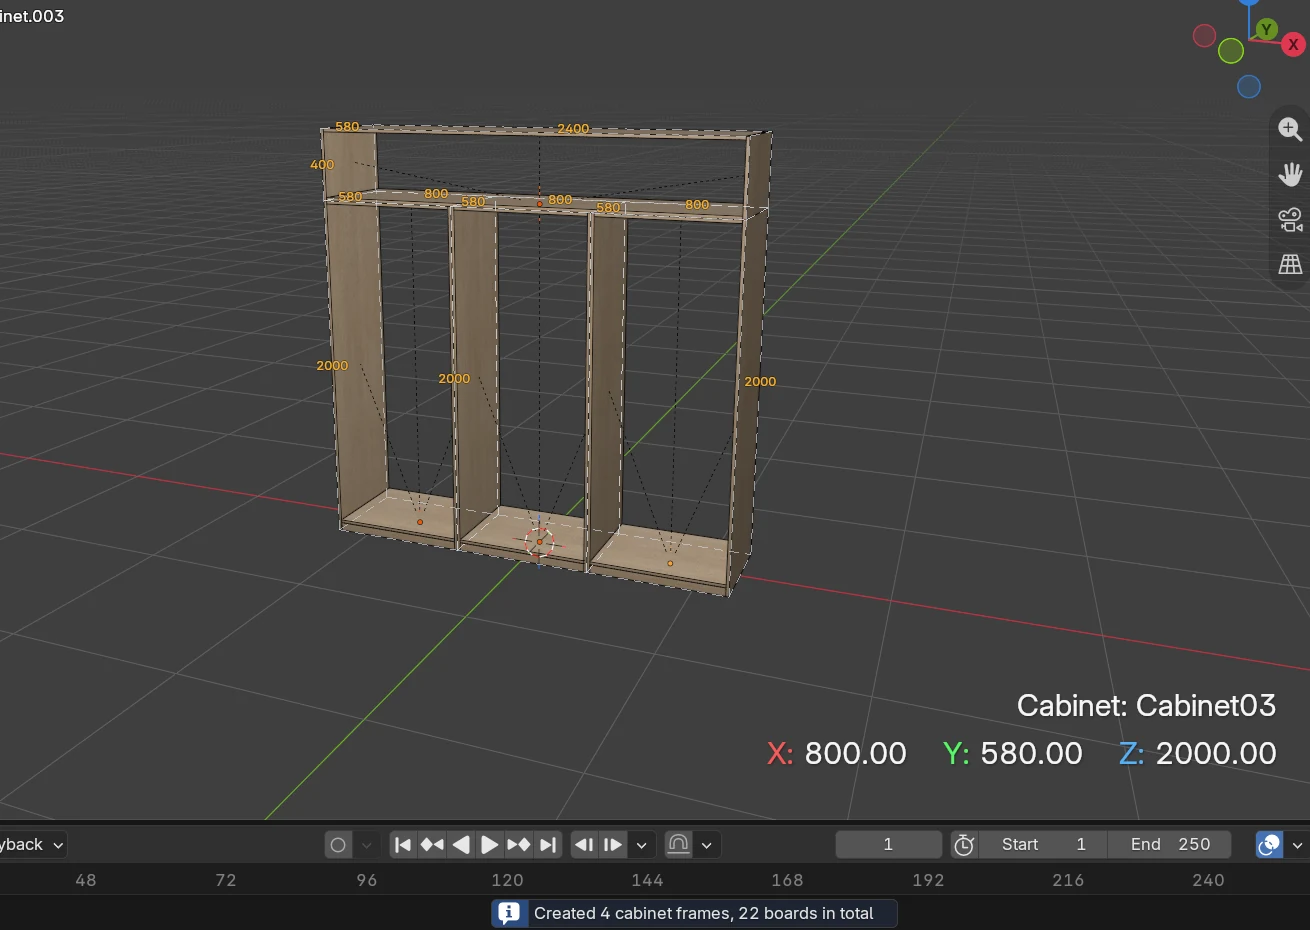
Each block keeps its size and becomes a cabinet with sides, top and bottom. Toe kick is on, and Auto toe kick leaves it off the top cabinet because it doesn’t stand on the floor. Press Enter.
3. Shelves with B
Point, roll, click
Press B (Quick Build) and point inside the left column. Roll the mouse wheel to split it evenly: the preview shows each gap. Click to place the shelves. You can keep placing more; Esc when you’re done.
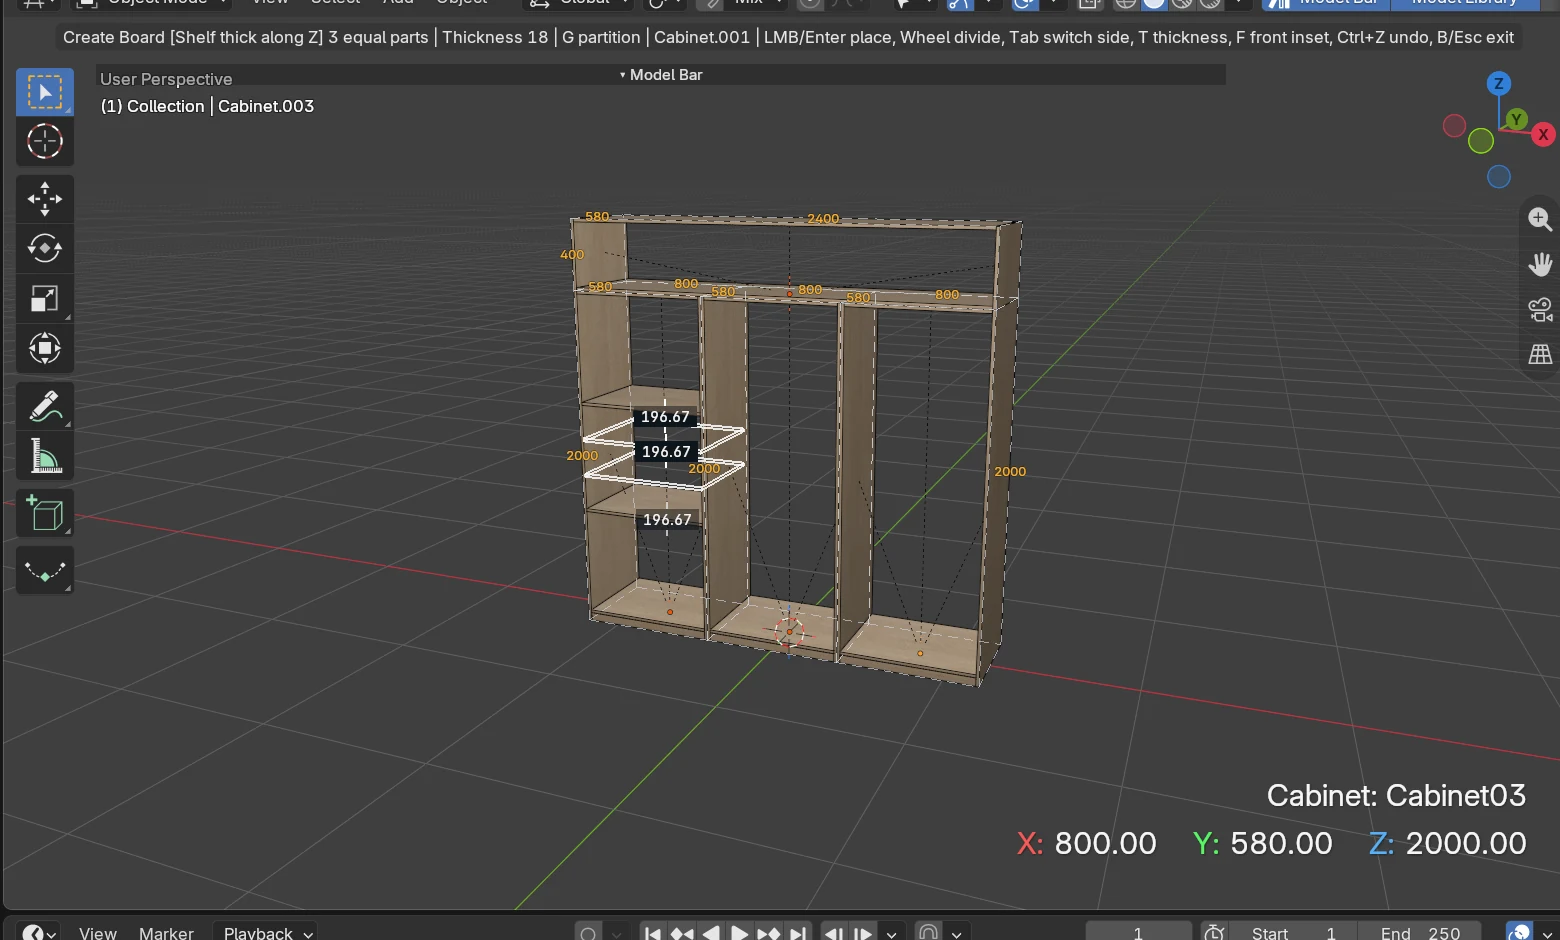
Point at a side panel to add shelves, at the top or bottom to add uprights. Instead of the wheel you can type an exact distance (for example 350) or a formula such as (2400-36)/3.
4. Back panel, drawers, rod and doors with C
C (Pick Inner Space) highlights the empty space under the pointer. Click to pick it, hold Shift to pick several, then right-click for what to put in it.
A back panel
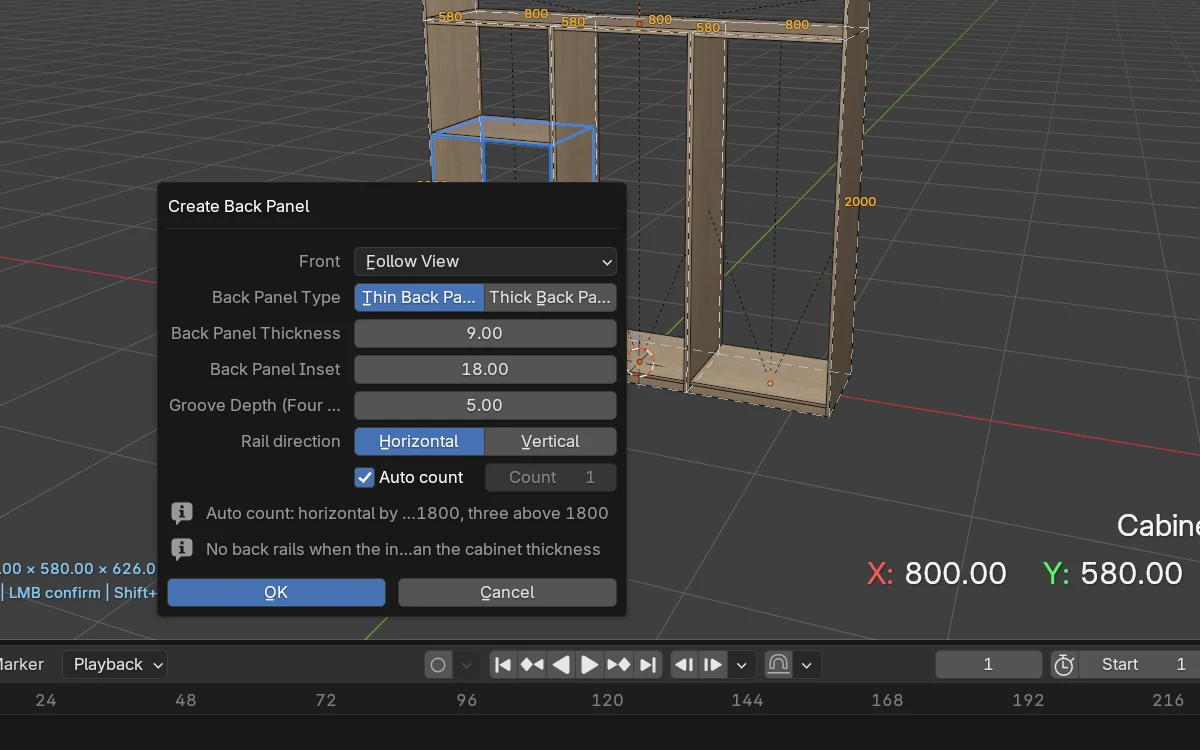
Press C, point at a space, right-click and choose Create Back Panel. Check the thickness and inset, then press Enter.
Two drawers
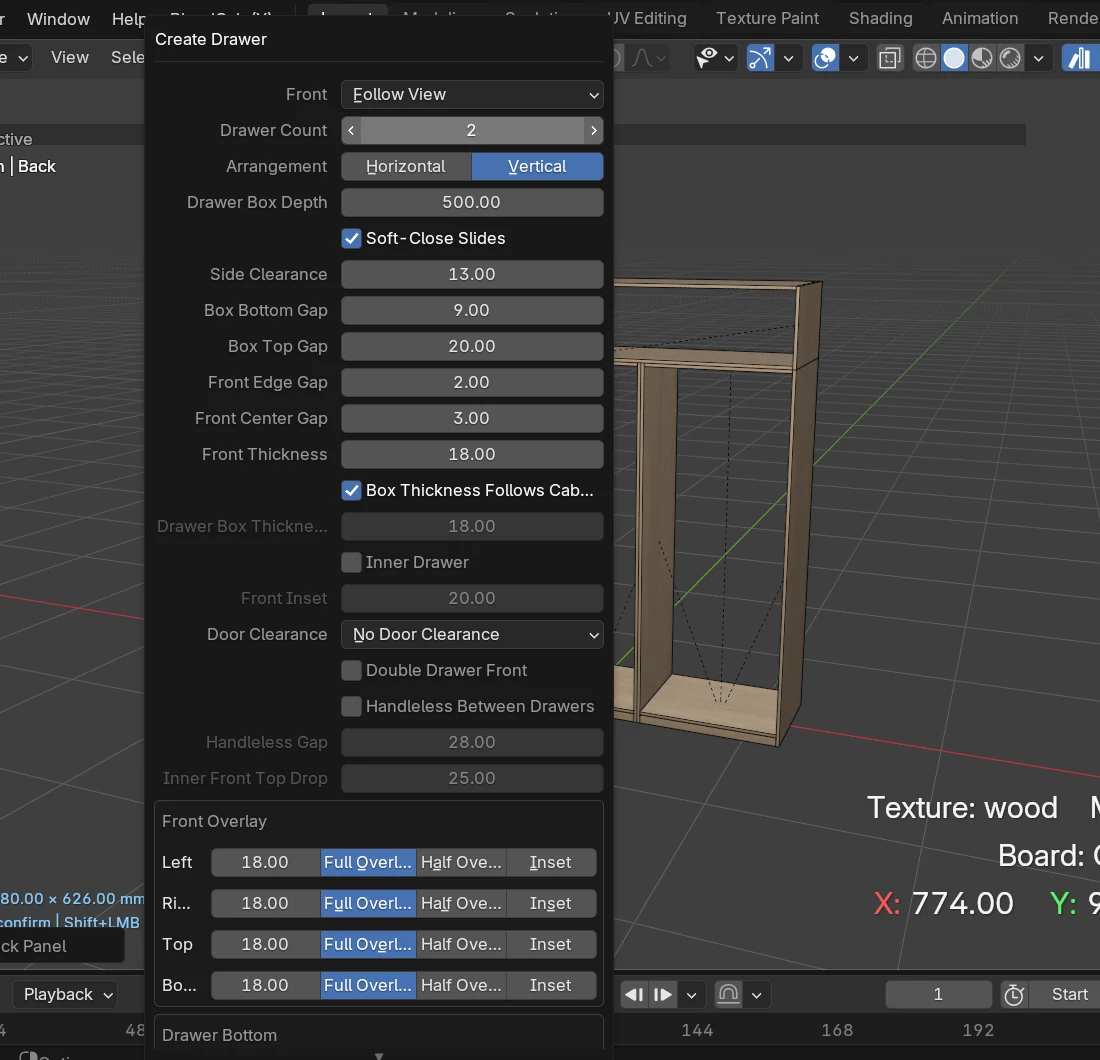
Right-click the bottom space of the left column and choose Create Drawer. Set Drawer Count to 2; soft-close slides, clearances and the front overlay are all in the same dialog. Confirm.
A hanging rod
Point at the middle column, right-click, choose Create Hanging Rod and press Enter.
Doors on two columns at once
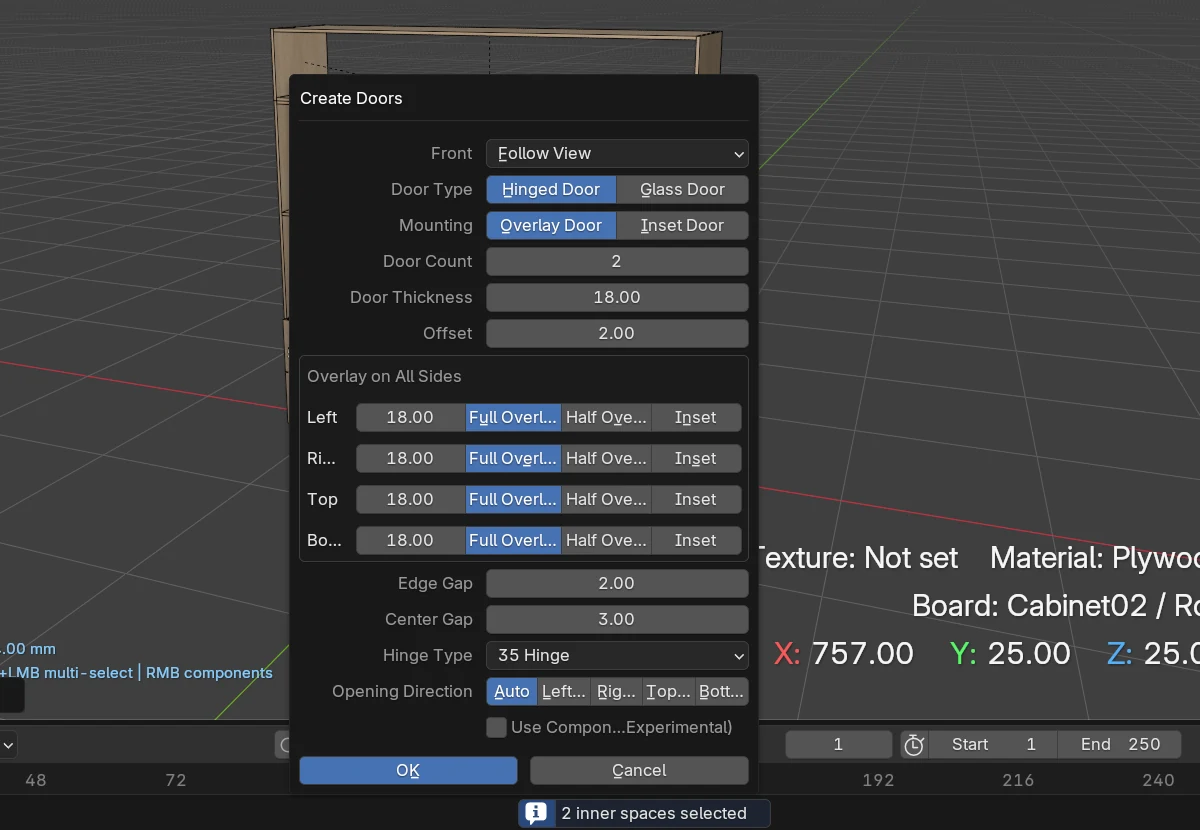
Hold Shift and click the middle and right columns. Right-click, choose Create Doors, and press Enter. With the defaults you get two hinged, full-overlay doors per column.
5. Adjust sizes
Resize a door with V
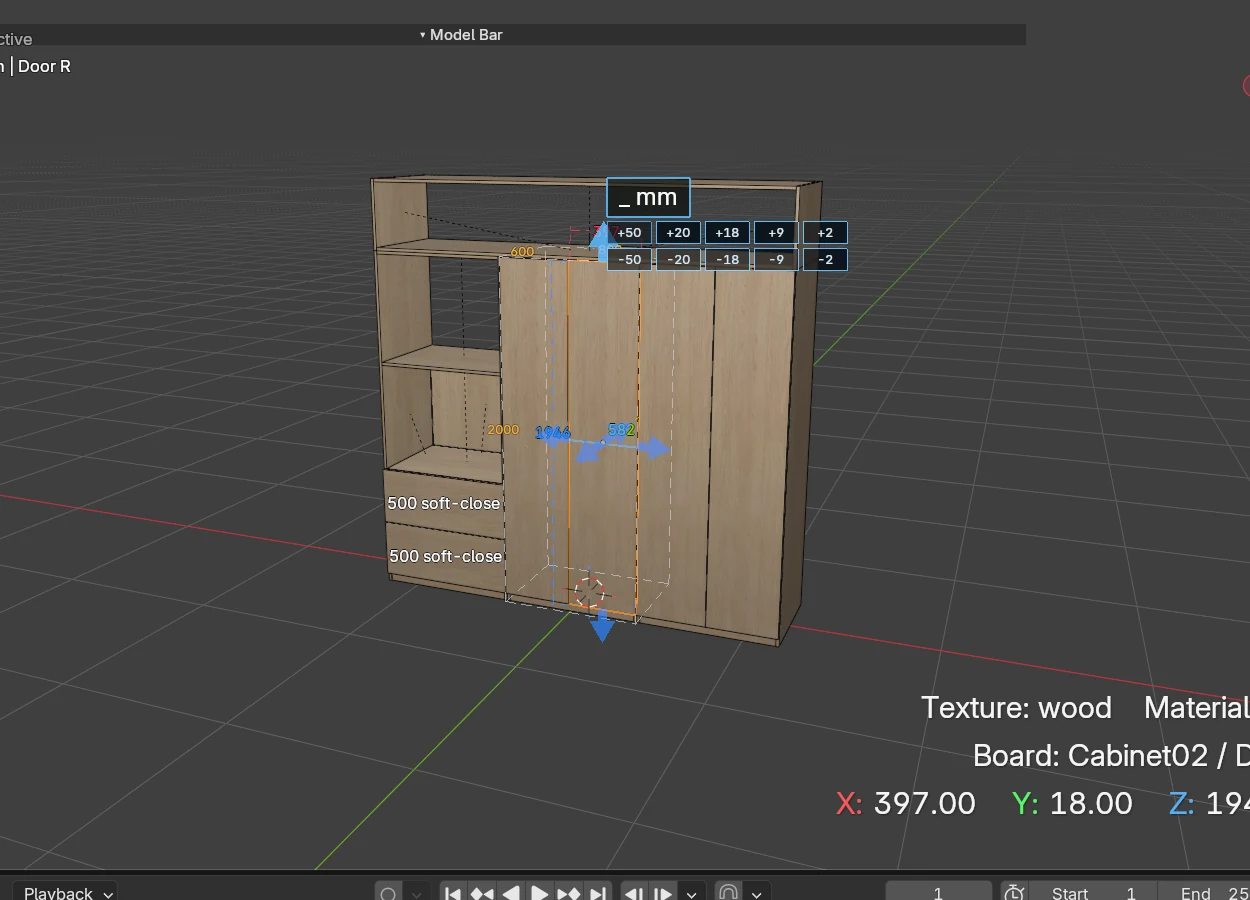
Press Esc to leave C. Click a door and press V (Quick Adjust): arrows appear on each face. Click the top arrow, type 1800 and press Enter. The door is now 1800 mm tall.
Set a space’s size with C
Spaces work the same way. Press C, click a space, click its arrow and type 700: the shelf moves so that the space is 700 mm tall.
Look inside
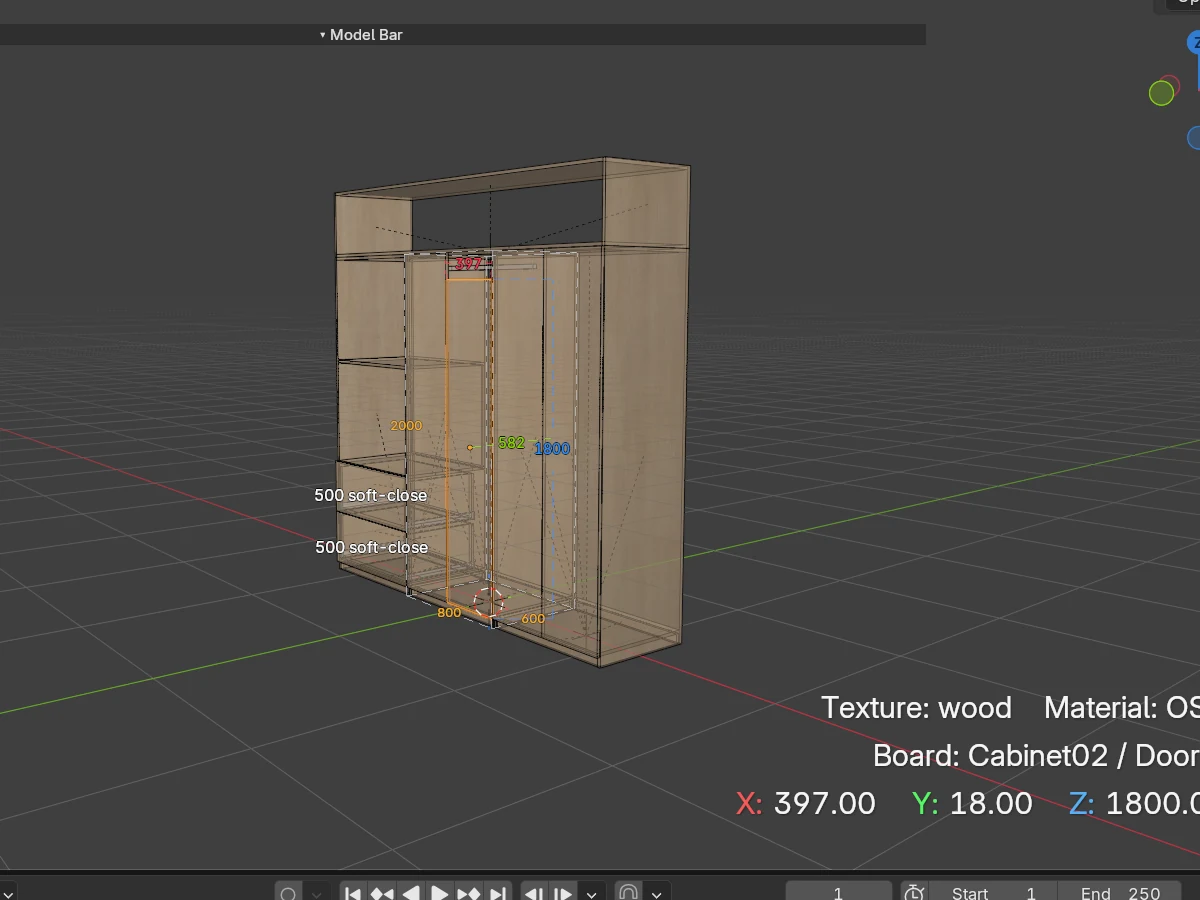
Press Esc, then Alt+Z for X-ray to see through the doors. Hold the middle mouse button to orbit. Point at a door and press F to swing it open, or at a drawer to pull it out; Alt+F closes them all. This is only a preview and doesn’t change the model.
Keys used in this tutorial
| D | BlendCab pie menu: every tool in one place |
| K | Quick Split: cut a block or cabinet; a number under 10 splits it evenly |
| B | Quick Build: shelves, uprights and dividers |
| C | Pick Inner Space: doors, drawers, back panels, hanging rods |
| V | Quick Adjust: pull one face to an exact size |
| L | Cabinet Stretch: resize a whole cabinet |
| F / Alt+F | Open the door or drawer under the pointer / close all |
| Esc | Leave the current tool |
The wardrobe is ready for production. Next: add cam connectors and send it to cloud nesting.